Marketing the Lemonade Stand – Part 1: Product


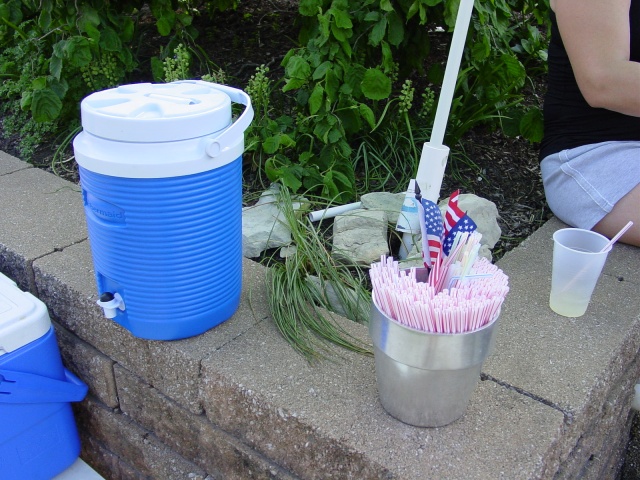
2.5 gallon cooler and fat straws


Summer is here and one of my kids’ favorite activity is to have a lemonade stand.  In the next few posts, I will offer pint-sized business lessons for junior entrepreneurs.  In today’s post I will share our recipe.  If you missed the last post, just scroll down and read about how to plan a winning lemonade stand run by kids.

In the next four posts we will look at the four P’s of marketing: product, place, price and promotion.

Product – The lemonade must be fantastic, SO good that your customers keep coming back for more.  This, of course, requires that you need to be in business for more than one day and offer a consistent quality product and variety.  We adapted the Old Fashioned Lemonade recipe from The Joy of Cooking to fill our 2.5 gallon coolers.

In a medium sauce pan combine the following ingredients and bring them to a rolling boil.  Boil for exactly one minute, remove from the heat and let cool to room temperature.

  • 4 cups granulated sugar
  • 4 cups water
  • 1/2 teaspoon sea salt

Pour cooled syrup into cooler and add:

  • one large bottle 100% pure lemon juice (32 fl.oz. or 2 dozen freshly squeezed lemons)
  • 1 can of frozen juice concentrate (orange, raspberry, lime, grape, cranberry, peach, or such…that’s how you create the different flavors each day)
  • filtered water to about 1-1/2 inches from the top of the container.

Stir very well.  This is the lemonade mix and it keeps for 5 days in the refrigerator (in case you have leftovers).  Do not add ice to the mix.  The ice goes into the serving cups and they get filled one customer at a time.

To fill a 5-gallon jug, just double the recipe!

The most popular flavors are:

  • orange lemonade,
  • pink raspberry lemonade,
  • orange dreamsicle lemonade (add 1 teaspoon vanilla extract)
  • lemon-lime lemonade
  • minty lemonade (brew fresh-picked mint leaves and use the brew in place of water)
  • green tea lemonade (use brewed green tea instead of water to fill it up).

One 2.5 gallon container fills 25 16-ounce cups.  One bag of ice from the store will be enough to fill all those cups half-full with ice.

We easily sell 25 lemonades in a 45-minute period.  More on really hot days.  Our record is 125 lemonades in 2 hours.  On those days we have back-up mix in the house and runners to restock the stand with more ice-filled cups and lemonade mix.

Fill each cup to the upper line and insert a straw.  Offer a napkin wrapped around the bottom, if you wish.  Serve with a big smile!

In the next post you will learn about the best places for the lemonade stand.

Make the lemonade recipe for your next BBQ or PTO event, and please share your own flavor variations!

Posted in Uncategorized | Leave a comment

How to plan a winning lemonade stand

We’re at it again…the 1213 Bellevue Lemonade Stand is open for business!
1213 Bellevue Lemonade Stand

A lemonade stand where everybody wins:

  1. The customer gets 16 ounces of real home-made lemonade for 50 cents;
  2. The kids have fun, earn money and learn real-life business skills;
  3. A charity benefits from the money raised;
  4. Bikers get free lemonade – we support green commuters;
  5. Get to know new residents in the neighborhood and the music box keeps everyone dancing for a little while.

Just a heads-up before you read on…this is serious business.  If you want to make a lot of money (like the $1,000 we raised for the ECC Play Park), you have to put in real work effort.  The money doesn’t just appear because the kids are so cute in their little lemonade stand. 

Are you ready to crank it up?

Step 1. Find a charity to support. 

Raising money for charity is a real winner.  People are much more generous and willing to buy and the charity gets to benefit from the net profits.  The kids are excited about how much lemonade they sell and this keeps them motivated to give it their best effort until all the lemonade is sold out.

I give the children choices of local charities to support.  Two years ago we raised $1,000 for our new school playground and this year we are supporting Friends of Kids with Cancer in honor of Katelyn, Seppi’s classmate who has a rare form of cancer.  (Site note: last year the kids sold lemonade for totally selfish reasons, a Nintendo DS, and the sales were pitiful.  Go raise money for charity, the kids still earn money as you will see.)

Step 2.  Lemonade stand set-up.

Like in any business, you will need to set up shop, hang out a shingle, create visibility, publicize your enterprise, purchase ingredients and supplies, provide excellent customer service and practice good sanitation practices.  Money needs to be collected, change made, counted, accounted for, bills paid and net earnings deposited at the bank.

Note to parents: this is a fantastic learning opportunity for your children in line with the Earn My Keep program.  David and Seppi started at ages 4 and 5, but in hindsight, I recommend ages 6 and up to make it easier on  yourself.  This still requires a lot of parent involvement, though and you need to plan for about 2 hours of hands-on assistance per session.

Here’s what you need:

  • 2.5 or 5 gallon cooler for the lemonade mix
  • ice chest to hold about 25 16-ounce cups with ice
  • fat straws
  • 16 ounce plastic cups
  • ice by the bag
  • lemonade
  • a LARGE sign
  • apron with pockets for cash and 8 quarters in the starting till

Additional equipment for a super stand:

  • A large, colorful umbrella.
  • Boom box playing upbeat, kid-friendly music.  We like Putomayo CD’s from the library and today we played Jump with Jill’s Get me Goin’ – awesome rock music for kids about healthy living!
  • Multiple signs leading up to your stand around the neighborhood.
  • More signs to hold up and wave or attach to kids’ bikes.
  • Balloons and streamers.

    Bikers get free lemonade


    The charity we support: Friends of Kids with Cancer


    2.5 gallon cooler and fat straws
     

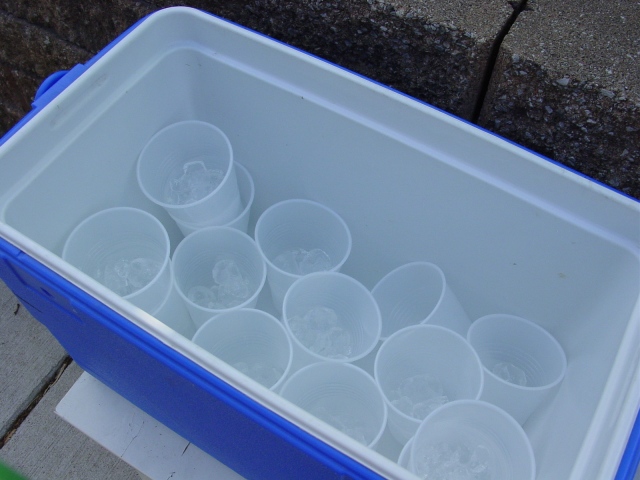
    16-ounce cups filled 1/2-full with ice cubes and placed in ice chest

    In the next post I will share our recipes and explain the book-keeping part. 

  • Are you in?

Posted in Uncategorized | 2 Comments

April Showers bring FOOD

This slideshow requires JavaScript.

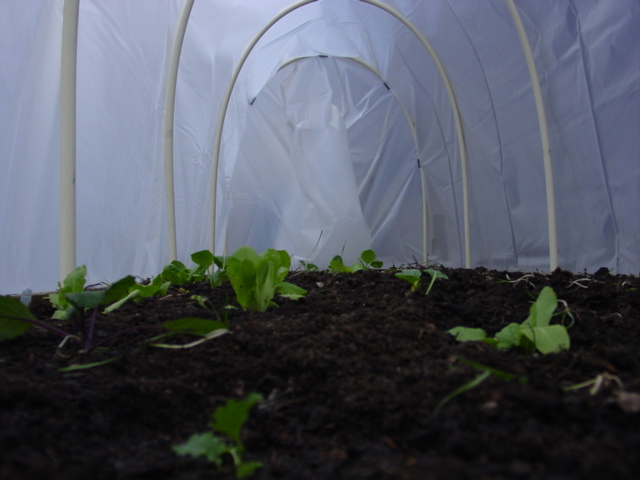
It’s been a month…please forgive me.  I’ve had a great, yet very busy month teaching many people about real fresh food, sanitation, jumping with Jill, the rockstar dietitian…and yes, even harvesting from the garden!  Remember the hoop house I built?  Well, we’ve been having homegrown greens every night for the past week and a half. 

Enjoy the pictures…maybe you are in them. 

(If you are wondering about the taped up fingers and walkers…that’s the nursing students learning to cook with disabilities and symptoms of aging like glaucoma, arthritis, Parkinson’s, stroke, loss of taste, loss of hearing, loss of sight, etc…  What a fun class that was.)

How is your garden growing?

Posted in Uncategorized | Leave a comment

Springblooms, Sunshine, Snow and Shaemus

What a week it has been.  Full of good things, and the pressure was on – yikes, all these deadlines…and thankfully Ann posted about being under pressure and it changed my perspective on every moment that I was called upon to give it my all:

Escapism always tempts: read a few pages of the book in the washroom, check email, see if there’s anything sweet on the pantry shelves, anything. Quick, let off some steam.

Sometimes it is direly necessary. Good and right. All pressure cookers have safety valves.

And yet too, the paradox, always the paradox:

When life heats up, escape can negate the efficacy of the Refiner’s Fire.

Letting pressure’s steam escape, may mean God’s dream for me escapes. Habitual escapism can escape His holy ends.

…Lock the lid on. Let life get hot.  Stay present. Breathe deep.

Let the pressure do its good, quick work.

This week’s gifts:

  • Connecting hearts
  • Boys making school breakfast
  • The school did not burn down – don’t ask
  • Fresh bread hot out of the oven and butter melting into it
  • Sleeping with an open window
  • Waking up to birds chirping
  • Getting to work at the crack of dawn and the rooster crows “welcome”
  • Pants-down races
  • Tuned-up bikes and David paying cash for his new wheels
  • The Lenten devotional
  • Karen – I just love you so
  • The boys enjoying dogsitting Shaemus
  • Lessons prepared and packed before bed time
  • Praying the stations of the cross from Mary’s perspective on the Day of the Annunciation of our Lord – 9 months until Christmas!
  • The hoophouse standing up to strong winds and SNOW!
  • Running into old dietitian friends and mentors
  • Italian music
  • Listening to Jonathan online 
  • 

Count your blessings and have a wonderful week!

Posted in Uncategorized | Leave a comment

How to “finish” Christmas

THIS, is what Lent is all about.  And no one can say it better than beautiful Ann Voskamp.  Please read her blog today: http://www.aholyexperience.com/

Posted in Uncategorized | Leave a comment

Spring Break’s Gifts

It’s been a good week, calm, peaceful, uneventful, mostly quietly hanging out at home.  I so needed that and enjoyed every moment of it.  Here are my favorites:

  • building Cairns in Forest Park
  • boys whispering under covers about what a great day they’ve had
  • David shoveling the neighbor’s sidewalk
  • roasting the last of the homegrown butternut squash…Spring come quickly!
  • cooking in Fontbonne’s new kitchen
  • late afternoon sunshine through the windows after a nap
  • boys chanting “home, sweet home” when pulling in the driveway
  • a sip of fresh coffee
  • bright sun in my office
  • no cavities
  • eager hunters for candy at the St. Paddy’s Day parade in dog town
  • 1st crocus, 1st daffodil and 1st mosquito of the season
  • staying home
  • cooking lots – I never get tired of cooking
  • the peace to rest and nap when not feeling so well
  • believing that a full moon is shining bright above these heavy rain clouds

What are you thankful for?

Posted in Uncategorized | Leave a comment

How I got the tax return done and you can, too

It has been a couple of days and so much is going on and I’m still under the weather and tomorrow I am teaching and Spring Break has come and gone and we’ve gone from  shoveling snow on Monday to sunburned shoulders on Thursday, and oh the life!   It’s messy and full and sparked with grace, ah, each moment, a gift; gifts to give and to bless others in need, delivering Lenten dinner…and this too is Lent, in old German “Lenz” which means Spring, and spring cleaning (and thanks to Fly Lady no more spring cleaning needed here).  Anyway, that’s my happy rambling tonight.

So, let’s get back to the tax return.  You probably got yours done before Valentine’s Day and smartly invested the return already…?  I don’t know how you all do this, but I still received documents in the mail a couple of weeks ago.  We have a huge stack of papers and receipts that we need for our return.  For years we paid a CPA do the deed, it seemed just too complicated to do it ourselves.  Until we got on the Dave Ramsey plan, and I was determined to do everything myself (and, no, I do not cook up my own batch of tissue papers, Karen ;-)).  Turns out, that I can read tax return instructions and follow them!  It takes forever, but it can be done.  And this is how I’ve gotten organized in the past few years to make it easier now:

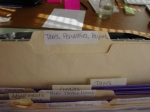
This is my little tax organizer.  It stays like this all year, because would you believe it: there are tax documents sent out at the end of May each year?  If you have an HSA, you’ll know what I mean.  And when those important docs fly in, I have a designated safe place to keep them until needed, about 10 months later.

Each folder is labeled with the type of documents that belong into each category, and the categories are taken directly from the online tax preparation software – in the exact order as they appear in the “interview.”

Initially, I taught myself to file a tax return the old-fashioned way, on paper, with a pencil and big, fat eraser close at hand.  That was a necessary first step to acquaint myself with the rules, credits, exemptions, limits, fees and fines.  Now, I simply complete the online tax interview and file electronically.

And when all the numbers have been checked and re-checked, I click “send return,” print out a hard-copy, save a copy on disk and stash all the papers in a large mailer – a previously used one, of course.

It is recommended to keep all tax documents for at least 3 years in case of an audit, and up to 7 years for business owners.  I like to keep them for decades -it’s a bit of my history in a way.  Places I’ve worked and seeing how much, or how little, money I’ve made and it was always more than enough.  It’s all a gift.

Here’s the bottom line to getting the taxes done, though: set a timer for 15 minutes and start getting the papers organized.  Add 15 more minutes a couple more times if needed, then take a break for 15 minutes.  You can also do 45-minute sesssions spread out over several days.  Simply start with the humble 15 – remember the journey of a 1000 miles begins with just one step.  You’ve one month to go: this year’s tax return deadline is April 18th!

Posted in Uncategorized | Leave a comment

Productive Procrastination

Today’s Lenten Calendar 2011 intention was to “Do something that you’ve been putting off for a long time or trying to avoid.”  As usual, the list of items I have been procrastinating on is long:

  • complete tax return
  • update the budget
  • call my aunts in Germany
  • plan the garden on paper
  • enter my professional development activities
  • re-write a cooking class curriculum
  • walk to Starbucks to redeem gift card from Christmas
  • and so on…

This list exists in the form of super-sticky Post-It Notes on my kitchen chalk board and many of them have lived up there long enough to become unsticky.  So I thought I’d just pick one for today’s project: the tax return.  And now I have to admit that I was very productive at doing everything BUT the tax return. 

I took the kids swimming, went grocery shopping, cleaned up a bit, checked and responded to emails, did a few other things I had put off, but these things have deadlines, so I HAD to do those.  And everytime I had the opportunity to start on the taxes, I found something else to do to help me warm up for the tax project:

  • make a cup of tea
  • go pee
  • get a piece of bread
  • straighten the papers on my desk
  • check my calendar
  • delete old emails
  • nosh on peanut butter straight from the jar
  • bring the tax box upstairs and congratulate myself on how organized I am

And now it’s 10 p.m., I have a sore throat and I should be going to bed instead of blogging.  I failed.  I confess, I am a productive procrastinator: I keep very busy but don’t get a lot done.  So tomorrow it’s time to use the TIMER, just as FlyLady taught me.  I will set the timer for 15 minutes and focus on just one thing: work on the taxes.   

I’ll keep you posted.

How do you overcome procrastination?  How do you focus your efforts to get stuff done?  I’d love to hear from you.

PS: The camera is dead and still charging…oh, yes…I am accepting imperfection!  Good night.

Posted in Uncategorized | Leave a comment

Chocolate for Lent

Have you seen the movie Chocolat? 

Blown in by the north wind, an iconoclastic single mother (Oscar nominee Juliette Binoche) and her young daughter move into a peaceful French village and open an uncommon chocolate shop during the height of Lent — directly across the street from a church. At first, the shop’s rich, sensuous desserts scandalize the town. But the villagers (including Judi Dench, Lena Olin and Johnny Depp) soon learn to savor the sweetness. – Netflix

It’s time to watch it again.  Even if you gave up chocolate for Lent – remember that Lent is not observed on Sundays – I invite you to gather some friends to watch the movie and do a chocolate tasting together.  It’s very much like a wine-tasting.

See and taste that the Lord is good.  – Psalm 34:8

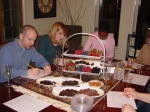
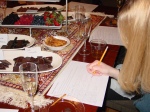
I found a website with ideas for hosting a chocolate tasting party, but you can just simple read on here and get the quick-read version.  I planned a chocolate tasting at a dinner party for our preschool teachers recently, and this is how we did it:

Supplies needed:

  • Platters or plates for chocolate (turn the chocolate pieces up-side down to keep the brand a secret)
  • Bowls for berries and salty snacks
  • 4 to 8 bars of chocolate – we had 8 for 30 people (see below for tips on selecting chocolates)
  • a variety of fresh berries
  • some saltines or pretzel sticks
  • warm, not hot, green tea slightly sweetened with honey
  • cups for tea (we used small plastic tumblers)
  • napkins
  • labels indicating the type of chocolate (cocoa %, origin, etc.)
  • pencils and a sensory evaluation form: Organoleptic Exploration of Chocolate

Then review the instructions with everyone at the table:

  1. Begin with a clean palate by taking a sip of warm green tea.
  2. Taste one chocolate variety at a time, exploring all sensory facets in order (see evaluation form) before proceeding to the next chocolate.
  3. Begin with a chocolate that has a low cocoa solids content and progress upward from there.
  4. Between each variety cleanse your palate by eating small amounts of fresh berries, dry salty snacks and drinking a few sips green tea.
  5. Keep notes on each variety tasted.

That’s it!  Have fun and let me know about your chocolate tasting party…and which chocolate is your favorite!

Tips on selecting chocolate:

 We had a variety of chocolates:

  • Different brands: Aldi’s Premium, Trader Joe’s Organic, Scharffenberger, Valhrona Noir, Lindt and Dove.
  • Different countries of origin: Africa, Madgagascar, South America, Ecuador, Venezuela, etc.
  • Different cocoa solids content: 33%, 55%, 60%, 65%, 73%, 75%, 85%
  • Different countries of manufacture: USA, Belgium, France, Germany, Switzerland and Austria
Posted in Uncategorized | 2 Comments

How to Build a Hoop House

Living and gardening in zone 5, we can expect overnight frosts until the end of April.  But I don’t want to wait that long, especially since my friend Debbie has had spinach growing in her hoop house for most of the winter.  It was time to build a hoop house of our own.  So after we assembled the necessary supplies, it went up in a jiffy and the planting actually took longer than building the row cover. 

So here’s how we did it:

Supplies needed:

  • Five 10-foot CPVC pipes (they are tan, not white, and more flexible than regular PVC), they cost about $25.
  • Ten 2-foot steel rods (these were Hwy 40 constructions scraps that the road builders at the Laclede Station overpass kindly let me have – yes, over a year ago)
  • 6 mil clear plastic sheeting cut into a 15 X 20 piece (my raised bed is 12 X 4 and the hoops are 4 feet tall) – I bought a large box to get the dimensions right, and I have enough plastic sheeting to make at least 5 more.  Please let me know if you want some, it’s 80 cents per linear foot at 20 feet wide.
  • Hammer
  • Measuring tape (maybe a calculator if you lack the math gene)
  • Sharpie pen
  • Vegetable oil or crisco
  • Hot air gun, optional (our neighbor is a plumber and he let us borrow his to help the PVC pipes expand before sliding them onto the steel rods)
  • 10 large binder clips
  • 2 x 4 boards or bricks/stones to weigh down the sides

Step 1: Measure the length of the raised bed and divide by 4.  Place Sharpie marks along the boards in this distance all along each side of the raised bed, always starting at the same end, in case you get off by an inch or so.

The green “grass” you see here is rye that I planted as a cover crop in November.  I tuned it over and it now serves as “green manure” to naturally fertilize the soil.  You can still do this until the end of April.

Step 2: Pound the steel rods into the ground, on the inside of the garden bed, until only 12 inches remain above the ground.

If you don’t have steel rods, you could use the next larger size of regular PVC pipes cut into 2-foot pieces and pound those into the ground instead.

Step 3: Heat the ends of the pipes to help them slip onto the steelrods more easily.  Lubricating the steel rods with some type of oil or grease also helps.   

Space the hoops evenly apart.  The hoops are as tall as David.

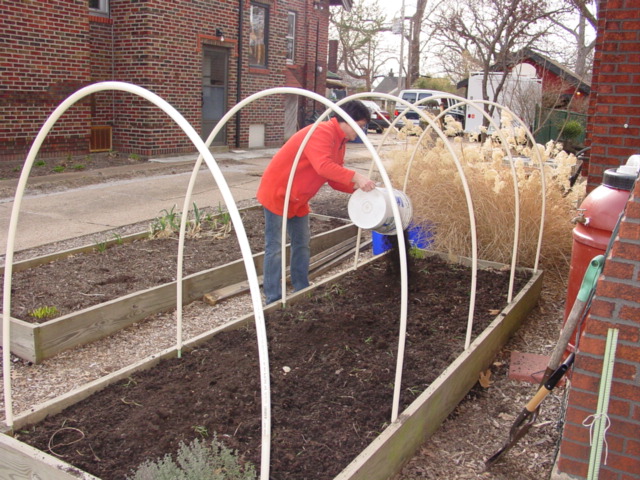
Step 4: Add the best compost blend you can get.  I’ve been lucky enough to bring food scraps home from work and let the microbugs turn it into this beautiful, rich soil.  This is the kind of thing that makes my heart beat faster!

Now the bed is ready for planting!  I purchased a few early plant starts at the hardware store: napa cabbage, red cabbage, buttercup lettuce, romaine lettuce, Swiss chard, collards and kale.

I use the square foot gardening method.  In the dark soil on the other side I planted two kinds of spinach and a mesclun mix from seeds.

Step 5: Finally, we covered the hoop frame with the plastic sheeting.  The hoops are very sturdy and do not require additional support.  The plastic is weighed down along the sides with scrapped 2 X 4 boards and secured with large binder clips.

Please tell me about your new garden project!

Posted in Uncategorized | 4 Comments